How to Make a Flower Crown: Step-by-Step DIY Guide
Learn how to make beautiful flower crowns for weddings, festivals, photoshoots, or just because. Complete tutorial for beginners with tips from the pros.
There's something magical about wearing flowers in your hair. Whether you're preparing for a wedding, festival, photoshoot, or just want to feel like a woodland fairy for the day, learning how to make a flower crown is a skill that opens up endless creative possibilities.
This guide walks you through everything you need to know to create stunning flower crowns with fresh flowers, artificial blooms, or a mix of both. No prior crafting experience required.
What You'll Need to Make a Flower Crown
Essential Supplies
- • Floral wire (20-22 gauge) - forms the crown base
- • Floral tape - secures stems and hides wire
- • Wire cutters - for trimming stems and wire
- • Scissors - for ribbon and tape
- • Ribbon (optional) - for tying and decoration
Flowers & Greenery
- • 3-5 focal flowers - roses, dahlias, or peonies
- • 5-8 secondary flowers - ranunculus, spray roses
- • Filler flowers - baby's breath, waxflower
- • Greenery - eucalyptus, ferns, or ivy
Step 1: Measure and Create the Base
The foundation of any good flower crown is a properly sized wire base.
- 1Measure your head - Wrap floral wire around your head where you want the crown to sit
- 2Add extra length - Cut the wire about 2 inches longer than your measurement
- 3Form the circle - Bend the wire into a circle and twist the ends together
- 4Reinforce - Wrap a second wire around the first for added strength
- 5Cover with tape - Wrap the entire base with floral tape
Pro tip: Make the base slightly snug. It will loosen as you add flowers.
Step 2: Prepare Your Flowers
Proper flower preparation ensures your crown looks full and lasts longer.
For Fresh Flowers
- • Cut stems at a 45-degree angle, leaving 2-3 inches
- • Remove all leaves from the stem portion
- • Keep flowers in water until ready to use
- • Work in a cool environment to prevent wilting
For Artificial Flowers
- • Separate flowers from their main stems
- • Cut stems to 2-3 inches
- • Bend wire stems to create attachment points
- • Mix with real greenery for natural look
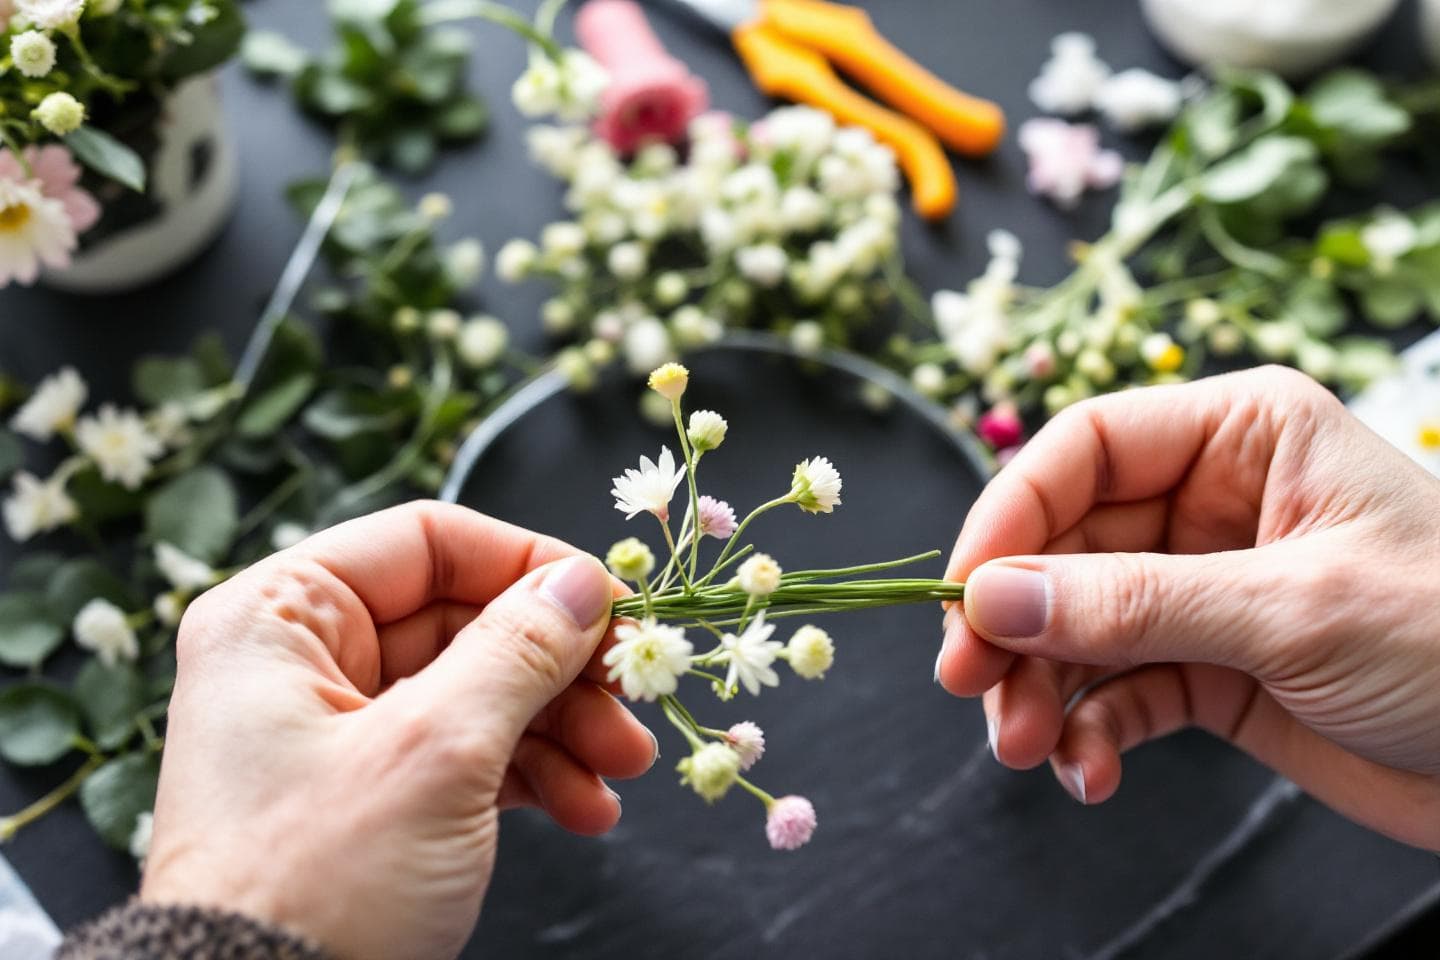
Step 3: Create Flower Bundles
Instead of attaching flowers one by one, create small bundles for a fuller look.
- 1. Group 2-3 flowers together with a piece of greenery
- 2. Wrap stems with floral tape starting just below the flower heads
- 3. Continue wrapping down the entire stem length
- 4. Create 6-10 bundles depending on your crown size
This technique gives you more control over placement and creates a cohesive look.
Step 4: Attach Flowers to the Base
Now comes the fun part - building your crown.
- 1. Start at the back - Begin attaching bundles where the wire overlaps
- 2. Position the first bundle at a slight angle, with flowers facing outward
- 3. Secure with floral tape - Wrap tape around the bundle stems and wire base
- 4. Add the next bundle - Position it to cover the stems of the previous bundle
- 5. Continue around - Work your way around the crown in one direction
- 6. Overlap generously - Each bundle should cover the stems of the one before
Arrangement Tips:
- Alternate between focal flowers and smaller blooms
- Add greenery between bundles for a natural look
- Step back periodically to check balance and fullness
- Keep the crown symmetrical or intentionally asymmetrical - both work beautifully
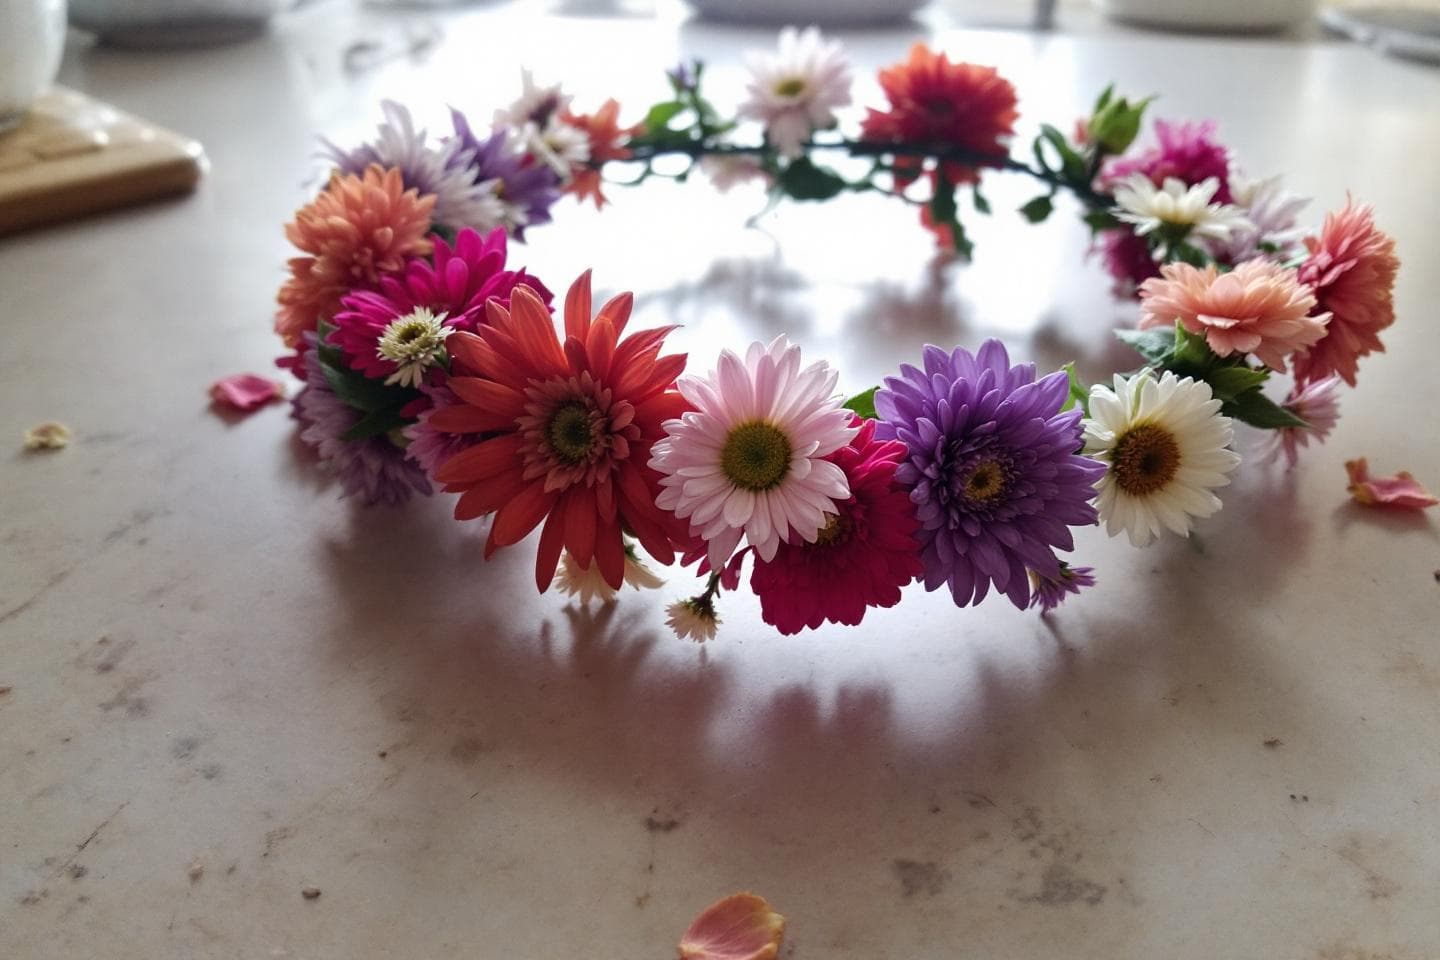
Best Flowers for Flower Crowns
Not all flowers work equally well in crowns. Here are the top choices:
| Flower | Why It Works | Best For |
|---|---|---|
| Roses | Classic beauty, many colors | Weddings, formal events |
| Ranunculus | Layers of petals, romantic | Spring events, photos |
| Dahlia | Bold statement, rich colors | Fall events, boho style |
| Baby's Breath | Delicate, long-lasting | Filler, minimalist crowns |
| Eucalyptus | Fragrant, drapes beautifully | Greenery base, boho style |
Fresh vs. Fake Flower Crowns
✓ Choose Artificial When
- • You need the crown to last multiple days
- • You're making it in advance
- • Weather conditions are extreme
- • You want to keep it as a keepsake
How Long Does a Fresh Flower Crown Last?
With proper care, a fresh flower crown can last:
- 4-8 hours at room temperature
- Up to 24 hours if refrigerated between uses
- 2-3 days if made with hardy flowers and stored properly
To maximize freshness, mist lightly with water before wearing, store in a cool place or refrigerator, and avoid direct sunlight. Choose hardy flowers like chrysanthemums or alstroemeria.
Troubleshooting Common Problems
Crown Falls Off?
Make the wire base smaller, add grip clips underneath, or use ribbon ties at the back.
Flowers Wilt Too Fast?
Use hardier flower varieties, keep crown refrigerated until use, mist with water before wearing.
Crown Looks Sparse?
Add more filler flowers, use greenery to fill gaps, create fuller bundles, overlap bundles more generously.
Frequently Asked Questions
How long does it take to make a flower crown?
For beginners, expect 45 minutes to an hour. With practice, you can create a beautiful crown in 20-30 minutes. The time also depends on how elaborate your design is.
Can I make a flower crown the night before?
Yes, especially if using hardy flowers. Store it in the refrigerator wrapped loosely in damp paper towels and plastic wrap. Fresh flower crowns made with proper storage can last overnight and still look beautiful.
How many flowers do I need for a flower crown?
A typical crown uses 10-20 flowers depending on size. Plan for 3-5 focal flowers, 5-10 secondary flowers, and plenty of filler and greenery.
Whether you're making a flower crown for your wedding day, a summer festival, or just because, the process is as enjoyable as wearing the finished piece. Start simple, practice the technique, and soon you'll be creating crowns that look professionally made.
Local Flower Team
Local Flower
The Local Flower team is dedicated to helping you discover beautiful blooms and connect with talented florists in your area.